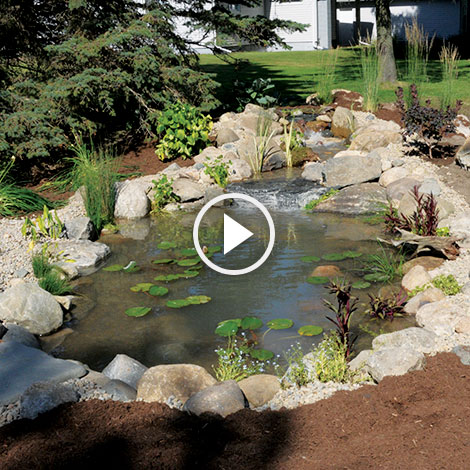

Have you been dreaming about the tranquility that the sound of a waterfall brings? Perhaps your neighbor recently put in a pond and you caught the pond building fever. Whatever your reason, a pond will make an excellent addition to your outdoor living space.
Whether you're still deciding on building a pond or you're ready to go, we'll walk you through all the steps. Learning how to build a pond is easier than it sounds, and if you're not sure where to begin, our pond kits include all the essentials you'll need to get started.
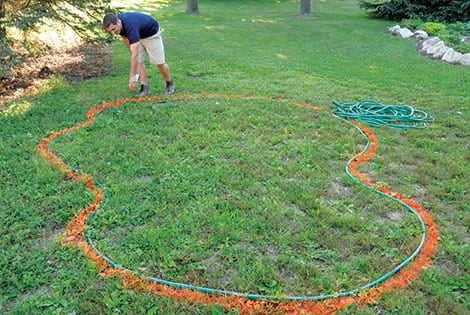
Step 1: Unpack Kit & Mark Area
Start by deciding on the location to build your pond and unpacking your gear. Use a rope or garden hose to help you visualize your pond layout. Once you decide on a shape you like, draw your lines with a can of marking paint and note where your waterfall will be. If you have curves, make sure they are wide to allow for proper circulation when your pond is up and running. Oval or kidney-shaped ponds are most common as they allow for optimum circulation. A waterfall located at one end of a slightly curved pond will gently push the water toward your skimmer or pump for circulation and filtration. Round ponds or those with many coves or inlets may have areas of little circulation, which will require extra waterfalls, fountains, or pumps to move the water and prevent it from stagnating. Also, be sure your waterfall will be turned towards your most common viewing area.
Step 2: Place Waterfall Filter, Skimmer, & Flexible Pipe
Place your waterfall filter and skimmer at opposite ends of the pond. Next, layout your tubing from the waterfall around the pond to the skimmer. Connect the tubing with the adapters and cement included in your kit.
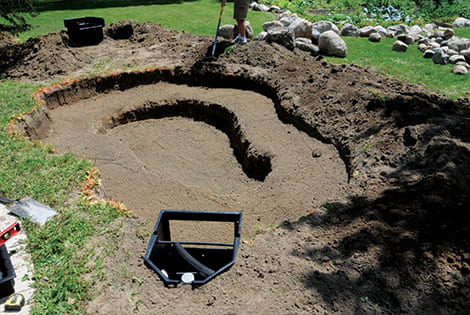
Step 3: Excavation of Pond Area
A helpful pond building tip is before you start digging, contact local authorities to check for hidden cables or pipes. Dig your pond area roughly 6-8" deep to construct a plant shelf and use the dirt to build a retaining wall for your waterfall box. Once the area is excavated, use the marking paint to make an outline for the deeper area of your pond. The size and shape is your preference, but keep in mind that this area will be filled with rock, so it is best to avoid tight curves; dig this inner area to about 2' deep. Lastly, you will need to excavate an area for your skimmer box. Keep in mind that you will want the skimmer opening to be about 1" above water level.
Step 4: Install Skimmer & Pump
Tamp and level the soil, then place the skimmer. Push the tubing through the grommet and into the skimmer. Assemble the check valve assembly on the pump and place it in the skimmer. Attach your check valve to the flexible tubing. Lastly, connect an overflow pipe to the back of the skimmer when you build your pond.
Make sure the overflow hole is near the top, above the natural water level, so you don't drain your pond too low. Attach a leak-proof bulkhead to the hole, which provides a female thread on both sides of the seal. Connect a male adapter that will allow you to seamlessly connect whatever length of heavy-duty kink-free tubing you need to run from your pond to a drainage ditch (for aesthetic reasons, we suggest you bury the tubing).
Step 5: Install Underlayment & Liner
Lay underlayment across the pond. Working it into all the corners of the excavated area, starting from the middle and working your way out. Be sure to leave it loose to allow for movement and settling in the future. Lay your liner over the underlayment and follow the same process.
Step 6: Attach Liner to Skimmer
Attach the liner to the front of the skimmer box using the faceplate; use a nail or other sharp object to make holes for two bolts. Temporarily remove the liner and place a large bead of silicone over the mounting holes. Reattach the liner and faceplate. Install the rest of the bolts and tighten. Lastly, trim the liner from the inside of the skimmer using a razor.
Step 7: Add Boulders & Rocks
Place larger boulders first for structural support, starting with the pond's vertical walls. Next, fill in with smaller boulders and rocks starting from the bottom and stacking on the inside of the pond. Be creative and if needed, rework the area to get the look you want. If you are unsure how much rock to get, use our calculator.
Step 8: Attach Liner to Waterfall Box
Your waterfall box should be level side to side and tipped slightly forward - about an inch - towards the pond. Hold the liner to the front of the waterfall box and mark the top bolt on each side. Remove the liner and apply a bead of silicone over the mounting holes. Reposition the liner and attach the waterfall weir using the bolts. After everything is tight, trim the liner using a razor.
Step 9: Add Gravel
Fill the gaps between your boulders and cover the bottom of the pond using gravel. The gravel will protect the liner and give it a more natural look. We suggest using gravel that is about 1" in diameter with smooth edges.
Step 10: Add Lights
Nestle your lights between the boulders. Be sure to wrap about 1' of power cord around the lights so you can extend it out of the pond for maintenance in the future. Place your lights so they shine out, away from the viewing area.
Step 11: Add Plants & Fill Pond
Place bog plants on the shallow plant shelf and lilies in the bottom of the pond. Don't worry if they aren't covering the pond's surface yet, they'll grow quickly. As the pond is filling with water, backfill around the skimmer and pond for additional support.
Step 12: Apply Waterfall Foam
Waterfall foam is fish safe and designed to fill in the gaps between rocks in the waterfall area. When you build a backyard waterfall, it's important to remember that, unlike a natural waterfall, every drop of water that cascades down the face of your mini-Niagara are delivered by a pump. In order to make that limited supply of pumped water - and your waterfall - look as dramatic and beautiful as possible, it helps to seal up the nooks and crannies behind and between rocks. When those areas are sealed, water is diverted over the tops of the rocks, making the waterfall look fuller and more beautiful. In addition to its aesthetic benefits, Waterfall Foam also helps to secure and stabilize larger rocks, which in turn reduces maintenance.
Step 13: Add Biological Media
Add filter media to your skimmer and waterfall box when building your pond. Use low or medium density pads in the skimmers and high or super high density for the waterfall box. The Matala Filter Media Pads are a great option since they are long lasting and durable. Give your beneficial bacteria a place to colonize by filling up the rest of your waterfall box with The Pond Guy BioBalls.
Step 14: Add Finishing Touches
A pond building tip is to trim the liner and underlayment, leaving about 6-8". Roll the remaining edge under the liner. Cover with gravel to secure and finish the pond's edge.
Step 15: Add Water Treatment & Review Owner's Manual
Once your pond is filled, start up your waterfall and add water treatments, such as water conditioner and natural bacteria to get the pond that you built ready for fish.
Enjoy!
That's it! Now you're ready to build a pond. Remember that you'll be enjoying your pond for years, so do your research, think everything through, and take your time designing something that you'll love!
If you have any questions or want to learn more about how to make a pond your own, unique space, reach out any time to one of our experts or read more from our learning center.